Last week, AWS announced the public preview for SAM Pipelines. This feature expands the SAM CLI allowing users to create multi-account CI/CD pipelines for serverless applications quickly across several providers such as GitHub Actions, GitLab CI/CD, and Jenkins. Along with CDK Pipelines, the AWS tooling keeps making it easier to standardize with best practices.
First, create a starter application. I chose amazon/nodejs14.x-base for a base image. Then, run the pipeline command with the --bootstrap flag to configure the CI/CD provider and requisite AWS resources like IAM policies.
initialize.sh
sam init
sam pipeline init --bootstrap
The pipeline command walks you through a series of configuration steps. For the CI/CD provider, choose GitHub Actions which is a two-stage pipeline. For each stage, provide the following information:
Name (i.e., pre-production, production)
Account details (i.e., access keys provided for AWS CLI)
The pipeline user’s access key and secret key will display in the terminal, which will be required for configuring the GitHub Actions. Repeat the steps for the second stage. The CLI creates .aws-sam/pipeline/pipelineconfig.toml to store the configuration.
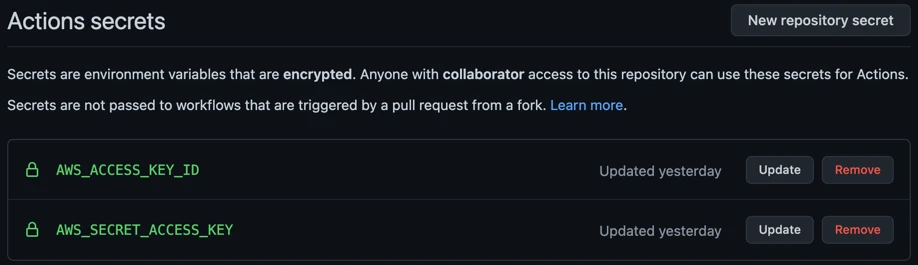
The CLI will prompt you for the secret name to use for the IAM pipeline user in GitHub Actions (i.e., ${{ secrets.AWS_ACCESS_KEY_ID }} instead of a hardcoded value). These credentials should never be exposed in the source code. pipeline.yaml is created in the .github/workflows folder.
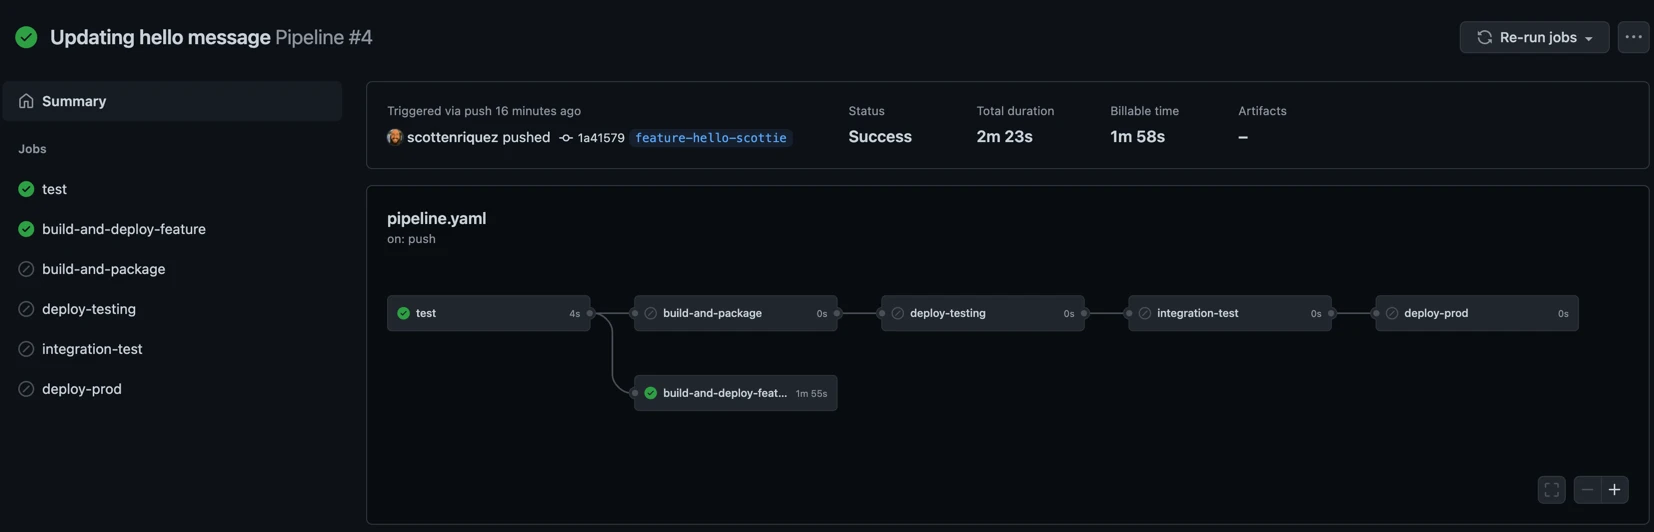
The default pipeline does not have any approval mechanisms in place, so when pushing to main, the application goes directly to production. To add approvers, create an environment in GitHub and add approvers. Then, reference the environment in the pipeline YAML.
For feature branches (i.e., named feature*), the pipeline will create a new CloudFormation stack and deploy the branch automatically. This is powerful for quickly testing in a live environment outside of the two stages created by the pipeline.
Note that there is no functionality in the default pipeline to delete the CloudFormation stack when the feature branch is deleted.
Both AWS CDK and Terraform aim to solve a similar problem: alleviating some of the infrastructure management challenges with code. CDK supports several general-purpose languages, including C#, Python, and TypeScript, while Terraform uses its configuration language called HCL. While CDK can only create AWS resources, Terraform supports virtually every cloud provider, granting the ability to write code to deploy to multiple public clouds at once. Last year, Terraform and AWS announced a project called Terraform for CDK, aiming to grant the best of both worlds (i.e., support for GPLs, multi-cloud, etc.).
In addition to the programming language features of AWS CDK, there’s a construct library with three levels:
L1 (level one) constructs are representations of CloudFormation resources
L2 (level two) constructs provide defaults and boilerplate to simplify the code
Patterns are the highest level and create many resources configured together wrapped in a single construct (e.g., Lambda RESTful API)
While CDK for Terraform utilizes the AWS construct programming model, it does not share the same construct library as CDK. It’s important to distinguish that CDK for Terraform stacks only support Terraform providers.
As noted above, the resources will be created using the Terraform AWS provider. There are corresponding C# classes for each of the AWS resources specified by the provider. While writing code, the AWS provider documentation in conjunction with your IDE’s autocomplete functionality is a powerful way to navigate the available resources. For this example, the code looks up the latest AMI for Ubuntu 20.04 and uses it to create an EC2 Instance. Below the AwsProvider constructor method call in the MyApp constructor method, add a data source and instance like so:
Once finished adding the data source and resource, the project can be built and deployed assuming that the AWS credentials are available (i.e., aws configure has been run).
While infrastructure as code (IaC) has existed within the AWS ecosystem since 2011, adoption has exploded recently due
to the ability to manage large amounts of infrastructure at scale and standardize design across an organization. There
are almost too many options between CloudFormation (CFN), CDK, and Terraform for IaC and Serverless Application Model (
SAM) and Serverless Framework for
development. This article
from A Cloud Guru quickly sums up the pros and cons of each option. I choose this particular stack for some key reasons:
CDK allows the infrastructure and the CI/CD pipeline to be described as C# instead of YAML, JSON,
or HCL
CDK provides the ability to inject more robust logic than intrinsic functions in CloudFormation and more modularity as
well while still being a native AWS offering
Docker ensures that the Lambda functions run consistently across local development, builds, and production
environments and simplifies dependency management
CDK Pipelines offer a higher
level construct with much less configuration than CodePipeline and streamline management of multiple environments
RUN if [ "$CONFIGURATION" = "debug" ]; then dotnet lambda package --configuration Debug --package-type zip; else dotnet lambda package --configuration Release --package-type zip; fi
RUN if [ "$CONFIGURATION" = "debug" ]; then cp -r /build/bin/Debug/net5.0/publish/* /build/build_artifacts; else cp -r /build/bin/Release/net5.0/publish/* /build/build_artifacts; fi
At this point, you can now deploy the changes with the cdk deploy command. The Lambda function can be tested via the
AWS Console. The easiest way to do so is to navigate to the CloudFormation stack, click on the function resource, and
then create a test event with the string "hello" as the input. Note that this should not be a JSON object because the
event handler’s parameter currently accepts a single string.
I used /casing for the path since the sample Lambda function returns an upper and lower case version of the input
string. Finally, it’s helpful to display the endpoint URL using a CFN output for testing.
With these changes to the resources, the Lambda function can be invoked by a POST request. The handler method
parameters in Function.cs need to be updated for the request body to be passed in.
After successfully deploying the changes, the function can be tested in two ways. The first way is through an HTTP
client like Postman. Add a string to the body parameter of the POST request. This action tests the full integration
with API Gateway as well as the Lambda function. To test via the Lambda Console, update the test event from before to
match the APIGatewayProxyRequest parameter:
For this example, the source code resides in GitHub as opposed to CodeCommit. To grant the CI/CD pipeline access to the
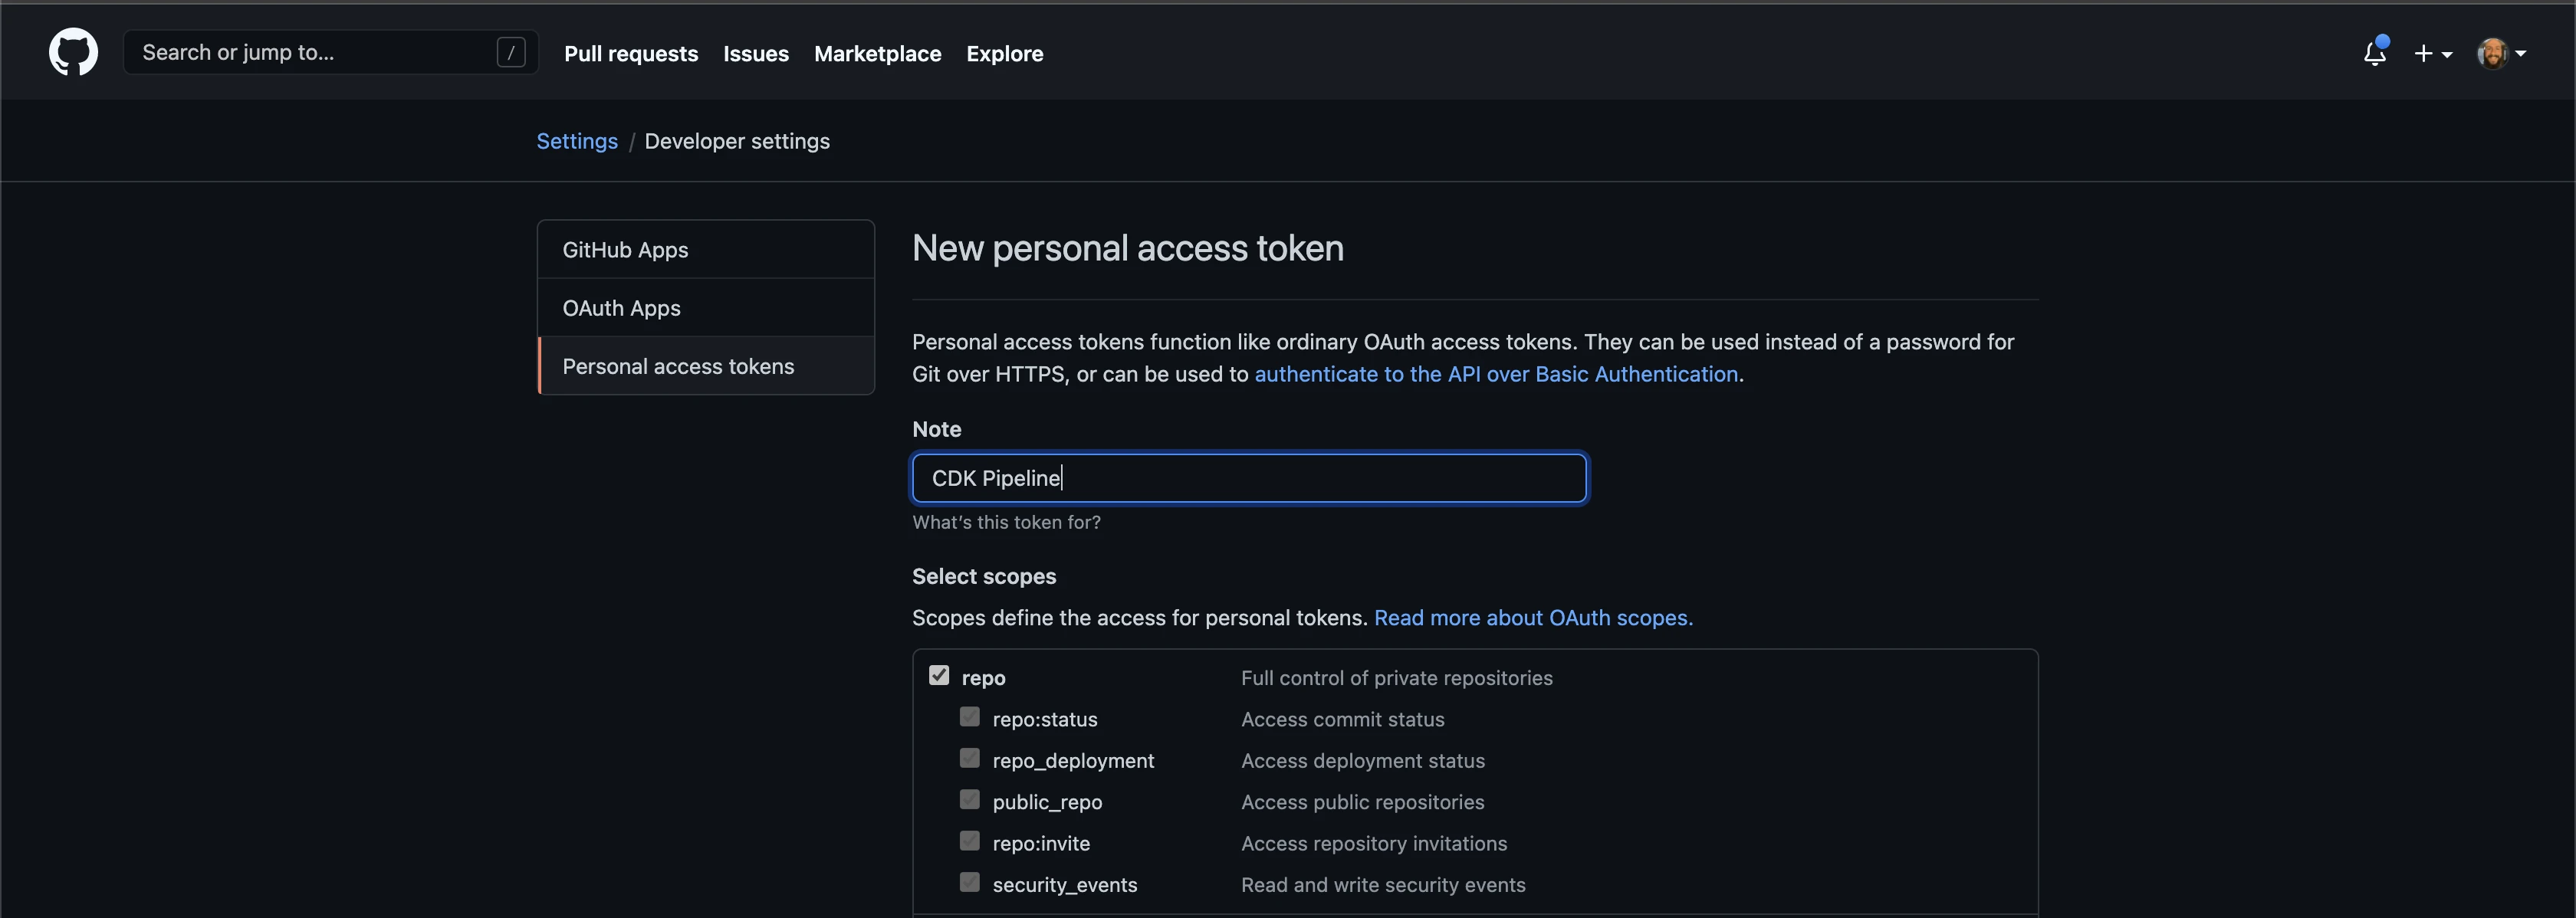
repository, a personal access token with repo permissions must be created via GitHub and stored in Secrets Manager as
a plaintext format object. Note that for this codebase, I’ve named my secret GitHub-Token.
Next, add the following packages to the CDK project:
With these dependencies loaded, create a class called PipelineStack.cs. The following code creates a self-mutating CDK
Pipeline, adds a GitHub source action to fetch the code using the token from Secrets Manager, and synthesizes the
solution’s CDK:
Delete the previous stack, commit the latest changes to the source code so that they’ll be available when the pipeline
fetches the repo, and finally deploy the pipeline:
deploy.sh
cdk destroy
gitadd.
git commit -m"Adding source code to GitHub repository"
From now on, the pipeline will manage changes instead of manual cdk deploy commands. By merely pushing changes to the
main branch, the pipeline will update itself and the other resources. The last feature in this example is adding
development, test, and production environments. Rather than creating more stacks, we can leverage stages instead. Each
environment will have a stage that makes a separate stack plus actions like approvals or integration testing. First, a
stage must be defined in code. For this example, a stage will only contain an API stack.
The Lambda function, API Gateway, and multi-environment CI/CD pipeline are now in place. More Lambda functions can be
added as separate C# projects. More stacks can be created and added to SolutionStage.cs.
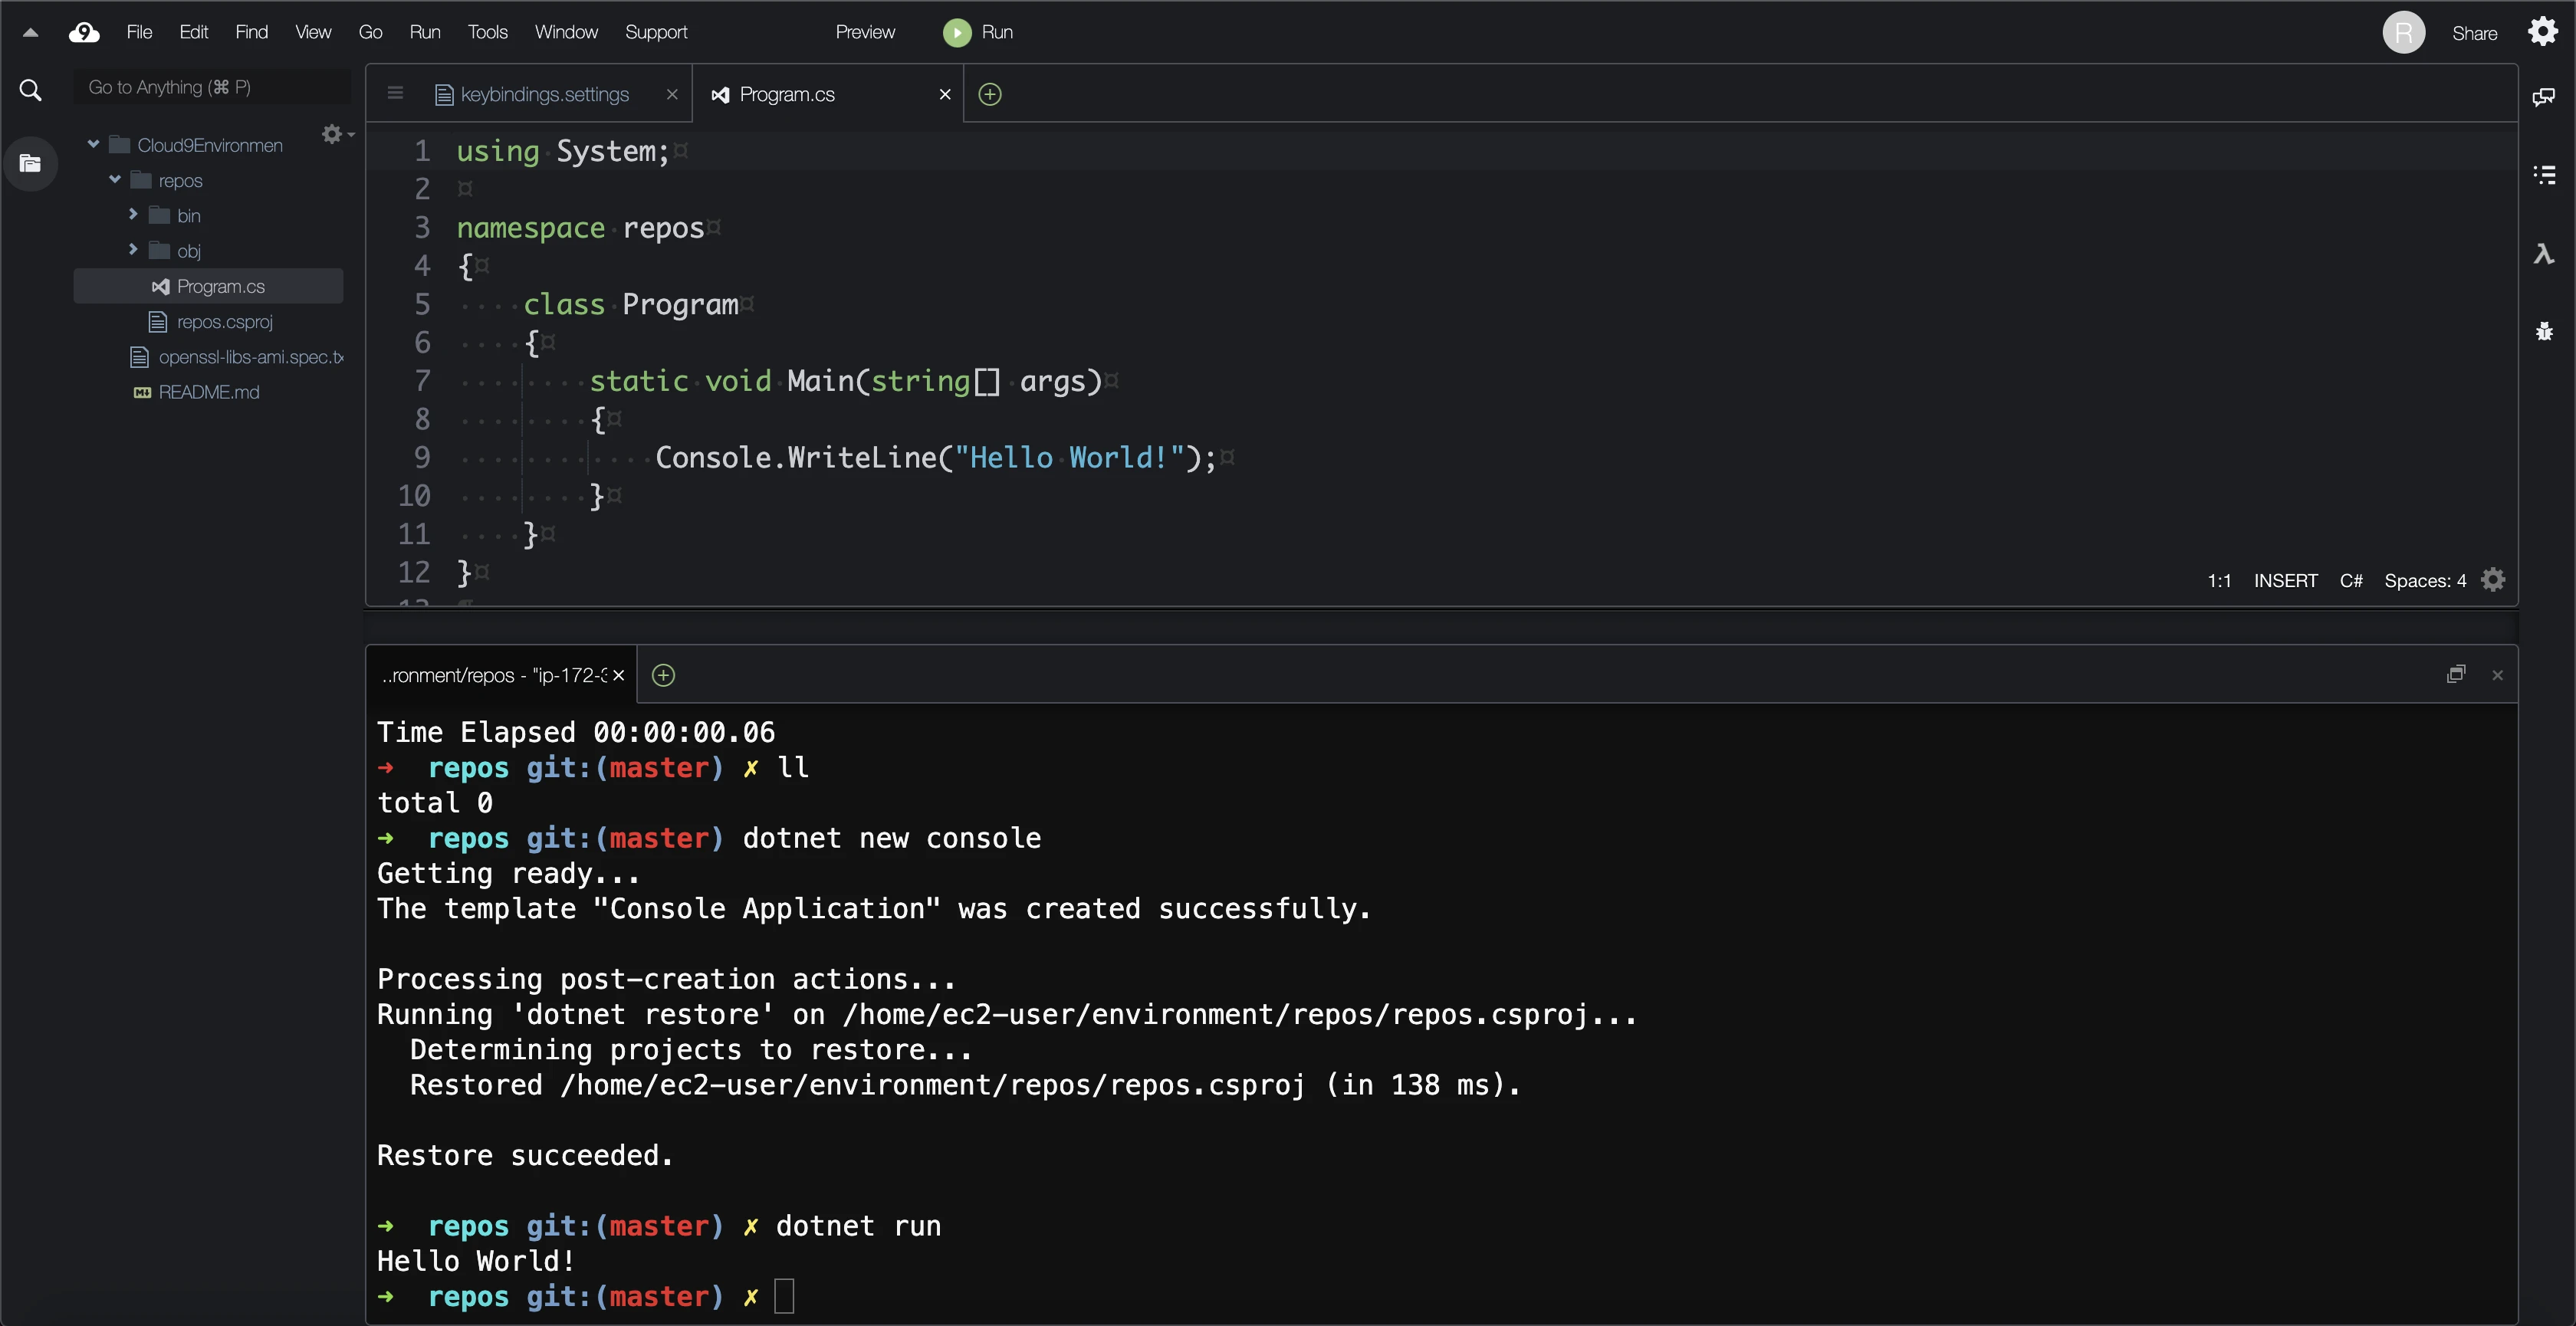
Per AWS, “Cloud9 is a cloud-based integrated development environment (IDE) that lets you write, run, and debug your code with just a browser. It includes a code editor, debugger, and terminal. Cloud9 comes prepackaged with essential tools like Docker and support for popular programming languages, including JavaScript, Python, PHP, and .NET.” The AWS, Serverless Application Model (SAM), and Cloud Development Kit (CDK) CLIs are pre-installed as well. Users are abstracted from credential management (i.e., there’s no need to provision an IAM user and run aws configure). Since the underlying compute is an EC2 instance, developers have a consistent experience across client devices.
Cloud9 makes it easy to declare an environment using CloudFormation, specify Git repositories to clone during the provisioning process, and share various custom settings such as themes and keybindings with developers. It’s also a cheap option since the EC2 instance shuts itself down after a set period of time (with a default of 30 minutes).
The first deployment fails unless a Cloud9 environment has been created from the Console due to an IAM service role created in the process (service-role/AWSCloud9SSMAccessRole). See more information in the AWS documentation.
The user-data.sh script is intended to run when the Cloud9 instance spins up (mirroring the EC2 instance paramater of the same name). Unfortunately, this setup must be done manually since there isn’t a parameter in the CloudFormation resource. To make this easier, I’ve added this GitHub repository to the list to clone on the instance.
Much like the user-data, the user settings aren’t parameterized in CloudFormation. These settings are included in the repository but must be manually configured.
I’ve been making a concerted effort lately to use infrastructure as code via CloudFormation for all of my personal AWS-hosted projects. Writing these templates can feel a bit tedious, even with editor tooling and plugins. I thought it would be awesome to generate CloudFormation templates for existing resources and first found CloudFormer. I found blog posts about CloudFormer from as far back as 2013, but it was never advertised much.
Former2 takes a client-side approach to infrastructure as code template generation and has support for Terraform and CDK. Instead of an EC2 instance, it uses the JavaScript SDKs via your browser to make all requisite API calls. You can even use the static website hosted on the public internet. If you’re not keen on the idea of passing read-only IAM credentials to a third-party website, clone the repository and run the web application locally via the file system or Docker. I’ve also created a CloudFormation template to run it on an EC2 instance:
Overall I’d argue that addressing the minor changes is easier than writing a template from scratch. With that being said, I don’t know that I’d ever spin up resources via the Console with the sole intent of creating CloudFormation templates. However, it could make migrating from a prototype to a productionized product easier if you’re willing to pay a small compute cost.
Setting up CloudFormer is quite simple through CloudFormation. In fact, it’s a sample template that creates a stack with several resources:
AWS::EC2::Instance
AWS::EC2::SecurityGroup
AWS::IAM::InstanceProfile
AWS::IAM::Role
AWS::IAM::Policy
The template has a few parameters as well:
Username
Password
VPC
After creating the stack like any other CloudFormation template, a URL is outputted. The t2.small EC2 instance is a web server with a public IPv4 address and DNS configured behind the scenes. The security group allows all traffic (0.0.0.0/0) on port 443, but it’s worth noting that I did have an SSL issue with my instance that threw a warning in my browser. The instance profile is used by the web server to assume the IAM role with an attached policy that allows for widespread reads across resources and writes to S3. Keep in mind that the CloudFormer stack should be deleted after to use to avoid unnecessary compute charges for the EC2 instance.
Navigate to the URL from the output tab of the CloudFormation stack (something like https://ec2-0-0-0-0.compute-1.amazonaws.com) and enter the username and password that you specified as a parameter. Via the GUI, select the resources to reverse engineer across the following categories:
DNS
VPC
VPC Network
VPC Security
Network
Managed
Services
Managed Config
Compute
Storage
Storage Config
App Services
Security
Operational
The list is robust but not all-inclusive.
Creating a Template for a CloudFront Distribution
I have a public CDN in one of my AWS accounts for images on a JAMstack site hosted on Netlify. It uses a standard design: a private S3 bucket behind a CloudFront distribution with an Origin Access Identity. Through the CloudFormer workflow, I selected the individual components:
CloudFront distribution
S3 bucket
Bucket policy
Sadly, there’s no support for YAML as of right now. The web server generated a JSON template, which I converted to YAML via the Designer.
I plugged the template back into CloudFormation, and everything provisioned successfully. Digging deeper into the template, I noticed a few minor changes to make. First of all, the logical names are based on specifics of the existing resources (e.g., distd1yqxti3jheii7cloudfrontnet came from the URL of the CDN). However, these can easily be refactored. Since CloudFormer doesn’t support creating an OAI, the existing identity is hardcoded. I added a resource for that to the template and converted the hardcoded value to a reference.
spr is a CLI tool for generating Markdown pages in the league Gatsby site for power rankings posts with Sleeper data injected. The source code is hosted on GitHub.
Navigate to the root folder of the league’s Gatsby site, and run spr add <WEEK_NUMBER> <AUTHOR_FIRST_NAME>. The alias for add is a. Open the generated index.md file in the newly created directory (<FIRST_NAME>-week-<WEEK_NUMBER>-power-rankings/) to enter the power rankings text for the new post.
The league-specific details exist in various JavaScript configuration files to maximize reusability. While the CLI is tightly-coupled with Gatsby, there’s still much that can be reconfigured for other leagues.
lib/config/gatsby.js
const gatsby ={
// used to determine if the user created a new branch
mainBranchName:'master',
// used to determine if the user is in the root Gatsby directory
configFileName:'gatsby-config.js',
// used to support any changes to the default blog path for vanity URLs
postPath:'/content/blog/posts',
// used to defer image styling for the avatar to the Gatsby site
I use Azure DevOps for building CI/CD pipelines for professional projects. Given the GitHub integration and broader feature set, I’ve started using it instead of Travis CI for my open-source projects too. For most technology areas, there’s a wide set of pre-built tasks that can be leveraged to build robust pipelines quickly. There are several tasks for compiling and publishing iOS applications using Xcode on transient macOS virtual machines.
However, in the spirit of using Swift like a general-purpose language, I wanted to use a Linux build server, a more industry-standard approach for CI/CD. In my previous post, I described how I set up a Swift executable package to be more testable. This pipeline provides continuous integration for it. Azure Pipelines, which powers CI/CD in Azure DevOps, is scripted in YAML. It also supports integrating shell commands to be run on the virtual machine.
The first thing to specify in the YAML is a trigger. The trigger denotes which branches in the Git repository the build should be run for. For example, to run the build only for master, the trigger would be as follows:
azure-pipelines.yaml
trigger:
  - master
In general, I want CI to run on all branches, so I use the following YAML instead:
After specifying the trigger, Azure Pipelines needs to know what type of infrastructure to run the build on. At the time of writing, 5.2 is the latest stable version of Swift. Swift is not currently available in APT, Ubuntu’s package manager. The binaries from the Swift download page target a specific LTS version of Ubuntu. The most recent version listed is 18.04, even though 20.04 released in April. Because of these specific requirements, I opted to target a specific version of Ubuntu in my YAML instead of ubuntu-latest. ubuntu-latest will be updated to 20.04 at some point, but this is outside my control.
With a product like Azure Pipelines that utilizes transient virtual machines, the customer pays for the server time. In short, the longer your builds take, the more expensive they are. Because of this and performance reasons, it doesn’t make sense to compile Swift from source each time the build runs (i.e., when a developer commits). The best practice is to fetch dependencies via the distro’s package manager for easier versioning and simple installation. With that not being an option for Swift on Ubuntu, the next best option is to fetch the binaries.
Azure Pipelines supports steps, which are logical sections of the build for human readability and organization. At a high level, the process is to:
Install dependencies for running Swift that aren’t shipped with Ubuntu
Make a working directory
Fetch the Swift binaries
Unzip the binaries
Add the binaries to the PATH so that swift can be used as a shell command
Echo the version to ensure that it’s working properly
In the pipeline script, the steps above are written as Bash commands and wrapped in a script YAML statement.
With Swift successfully installed, the remainder of the build steps is scripted in additional steps. This commonly entails compiling, running unit tests, and static code analysis. For the sake of a simple executable package, this could be merely running swift test like below. Putting it all together, this YAML script is a solid base for many Swift package CI jobs.
To better learn Swift, I’ve been trying to use it as a truly general-purpose programming language instead of purely iOS development. I’m currently building an iOS app that requires multiple versions of the same vector graphics (SVGs). I couldn’t find an open-source solution for my needs, so I decided to start scripting. Typically, I would have used Python or Node.js, but I powered through with Swift in the spirit of immersion.
Getting the initial project structure and unit tests set up took some research, so this quick guide will outline how I’ve been structuring my codebases for executable packages. Outside of iOS development, Swift’s documentation isn’t as robust as Python or Node.js, given the age difference. This blog post’s objective is to merge a lot of useful knowledge I found across forums.
Use the Swift CLI to create an executable project with this command: swift package init --type executable. It’s important to note that the names will be created based on the current directory. If you want to use a name for your project other than the root directory, create a new folder and run the command there.
initialize.sh
mkdir AlternatePackageName
cd AlternatePackageName
swift package init --type executable
To open in Xcode, run open Package.swift. Swift has created a project with the following structure:
Executable modules are not testable. The implication is that functions cannot be tested inside /Sources/SwiftPackageExecutable (in the same directory as main.swift). Doing so will throw an unhelpful compiler error. The alternative is to move the logic to a library module. This requires a change to the directory structure and default Package.swift.
Package.swift
// swift-tools-version:5.2
importPackageDescription
let package =Package(
name:"SwiftPackageExecutable",
dependencies:[],
targets:[
.target(
name:"SwiftPackageExecutable",
dependencies:[]),
.testTarget(
name:"SwiftPackageExecutableTests",
dependencies:["SwiftPackageExecutable"]),
]
)
First, set the products variable in between the name and dependencies. Create .executable and .library entries like so:
Next, in the array of targets, add another .target for the library, and update the dependencies. The executable and test modules should depend on the library.
I co-teach an advanced placement computer science class at Heights High School in Houston with the TEALS program. The curriculum utilizes the Java programming language and has an emphasis on object-oriented programming. From a school IT system perspective, we have limited options for the software we can distribute to the students’ laptops. During my first year of volunteering, we opted to use BlueJ for the first couple of months before exposing them to Eclipse, a more heavy-duty integrated development environment. Both editors have their challenges and limitations for novices, so we began to evaluate several other options, including Visual Studio Code. After considering numerous factors, including the complexity of installation, editor features, and accessibility, we opted to try a radically different option: Repl.it.
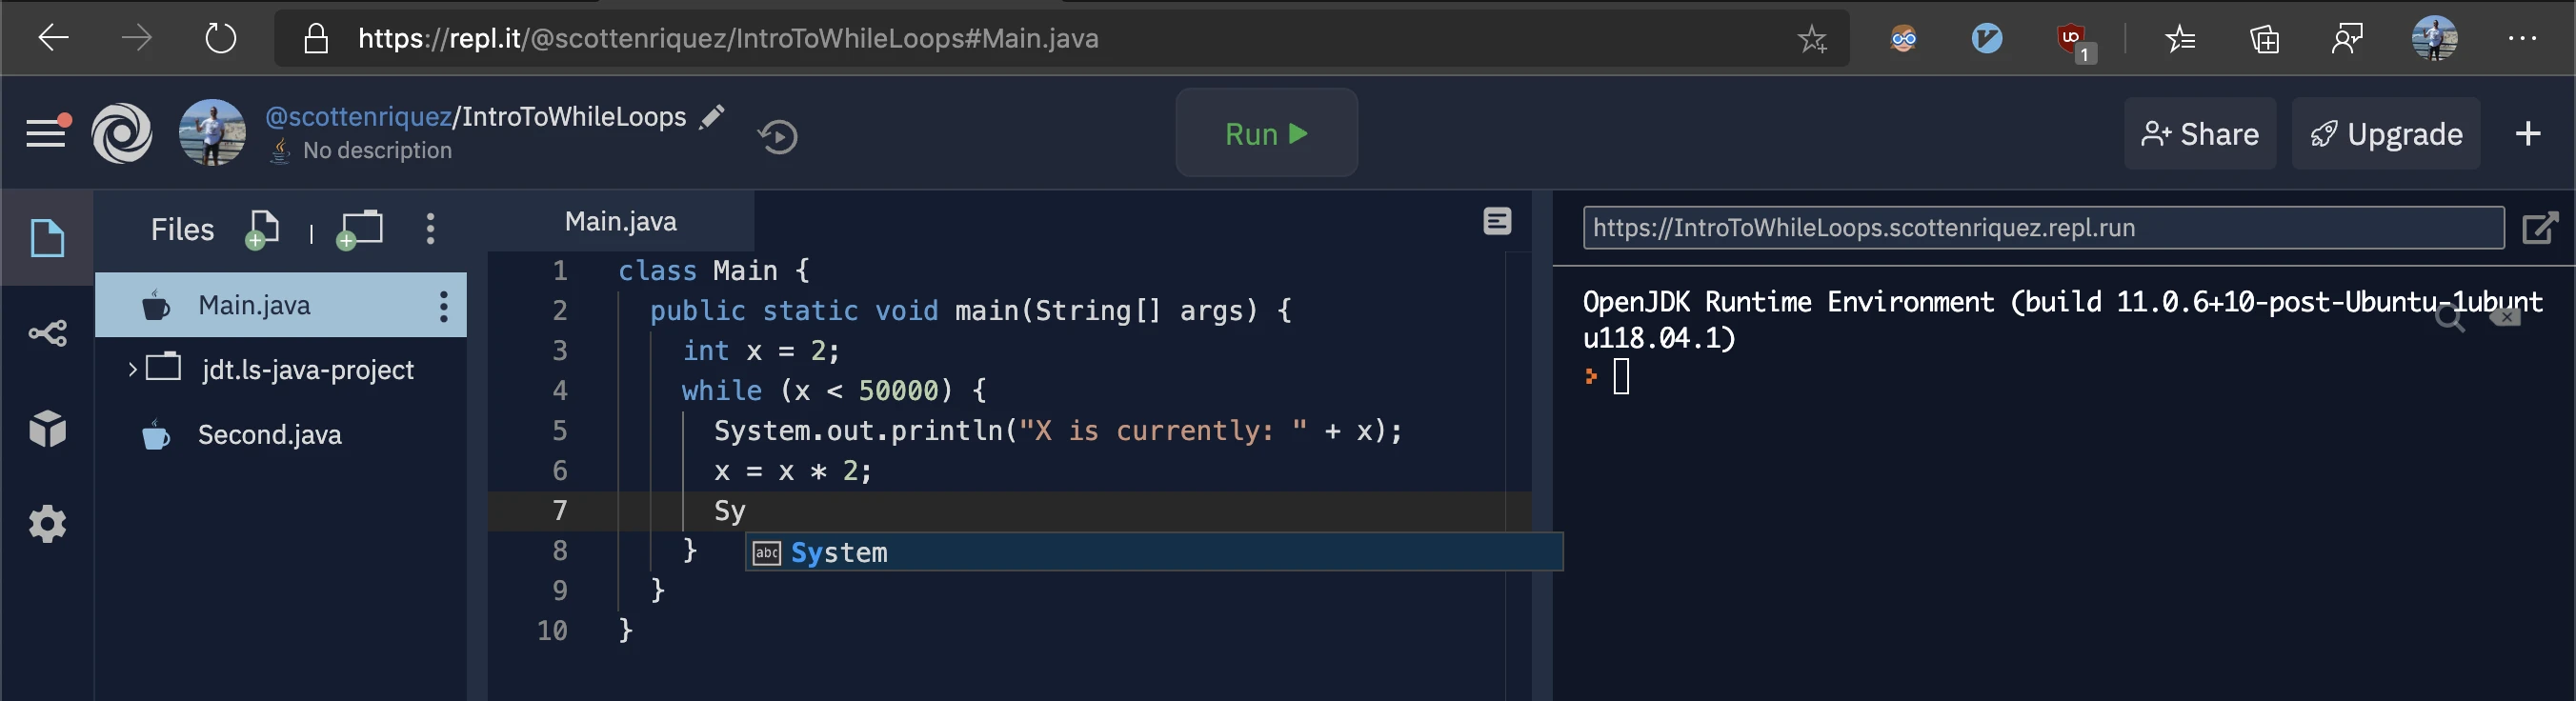
Repl.it is a feature-rich, browser-based IDE with support for numerous programming languages, including Java. In addition to the editor and computing environment, the application supports classroom features such as creating assignments that I will detail further below. Since Repl.it runs in the browser, there’s no installation or configuration in terms of editors, runtimes, etc. Using a browser-based tool decreased the number of local support issues that we had to address. We found that students had much fewer problems with getting acclimated to the tooling compared to BlueJ and Eclipse. The user interface proved to be intuitive. There were relatively few issues with the underlying runtimes and virtualization that Repl.it abstracts from the user.
Repl.it requires an internet connection, and teachers shouldn’t assume that students have internet access at home. Though many classes will be online due to the COVID-19 global pandemic, keep in mind that students may have limited connectivity. I recommend offering desktop IDEs as an offline alternative so that students can at least run code locally.
Repl.it is free for schools. There’s an excellent video overview of the features on YouTube. Last year, we used Repl.it Classroom for assigning coding homework. We use other software like Practice-It for some assignments but struggled to find a way to evaluate raw source code. Repl.it simplified grading because we didn’t have to pull down students’ source code and build on our local machines.
While Repl.it is excellent for running code and submitting assignments, it doesn’t offer built-in source control. Teachers create classrooms on a per year basis, so sharing examples and references across classes isn’t transparent. Each environment targets an individual student exercise, so collaboration isn’t seamless either.
GitHub offers a public place to store code and implement software development workflows like pull requests and CI/CD. At Heights High School, we’ve hosted solutions here for students and any other teachers who want to use the code in their classrooms. The source code for this project resides in a public repository as well. Repl.it has native GitHub integration so that a public repository can be imported when creating a new Repl. The Repl syncs with the GitHub repository so that when a developer pushes changes to the remote origin, the updates propagate to Repl.it.
With GitHub, a team can create a template project to be used when a new repository is created. Templates allow developers to have codebase structure (i.e., putting source code in /src) and configuration files injected into every child repository. Under the repository settings page, check the template repository flag. After this, when creating a new repository, the template should appear as an option for the base.
I’ve included an EditorConfig file in this project so that the code styling remains consistent across multiple codebases. EditorConfig is IDE-agnostic with plugins or native integration across IntelliJ, Visual Studio Code, Eclipse, etc.
Repl.it supports a configuration file that allows a developer to specify which language and run command to use. Without going into details about the recent changes to Oracle’s Java license structure, I’ll note that this project uses OpenJDK 10, which is free and open-source. The run variable in the configuration file refers to a shell command to compile and execute the program. Bash on the underlying Linux virtual machine interprets the command, so it isn’t specific to Repl.it. The run command can be tested on a local computer or by modifying the configuration file directly in Repl.it.
Despite being played by amateur student-athletes, college football has become a multi-billion dollar industry. Most likely due to the emotional connection to an academic institution and the incredibly entertaining and volatile lack of parity and consistency amongst teams, college football fans tend to be even more diehard than their NFL counterparts, particularly in the South. Though college football is played by undergraduate and graduate students, players are scouted as recruits as early as middle school. These recruits are evaluated based on several factors that indicate their success at both the collegiate and professional levels of football. Whether physical attributes like height and weight or skill sets like blocking and catching, all of these attributes plus countless others are synthesized into a rating. Recruits are then offered by universities culminating in commitments and signings. A good recruiting class can be an indication of future success for a college football team provided that the coaching staff develops talents as expected.
This repository is a set of Python and shell scripts to fetch and process publicly available data from 247 for non-commercial, personal data analysis use to be done using AWS Athena. It’s co-authored by Callen Trail. As is the nature of web scrapers, the HTML parsing code is brittle. If the page structure changes on the site, the scripts will need to be modified. The process is split into three stages.
All Python dependencies are located in requirements.txt. To run, simple execute the command python scrape_recruit_list.py <START_YEAR> <END_YEAR>. This range dictates the volume of data captured by core logic of the script like so:
print(emoji.emojize(f':file_folder: Wrote {year} recruits to {file_name}'))
The script will generate a file for each year (i.e. recruit-list-2020.json) in the recruit-lists directory. The files in this directory are treated as build output and ignored via the .gitignore. There’s also some basic exception handling to insert default values for inconsistent or missing data.
Stage Two: Obtaining Ranking History and Recruiting Timeline Events
With a set of lists generated by stage one, the process_recruits.py script fetches and parses the complete ranking history and timeline of events (i.e. official visits, offers, etc.). To run, pass a recruiting list from stage one and the corresponding year to produce the files: python process_recruits.py 2020 recruit-lists/recruit-list-2020.json.
Recruit ranking histories are stored in the following path: recruit-ranking-histories/{year}/{247_id}.json. For example, Bryan Bresee’s path would be recruit-ranking-histories/2020/46038819.json in the following format:
recruit-ranking-histories/2020/46038819.json
{
"247_id":"46038819",
"rating":0.9995,
"rank":1,
"change_date":"2020-01-31",
"delta":-0.0002,
"delta_inception":0.0295
}
Recruiting timeline events are stored in the following path: recruit-timeline-histories/{year}/{247_id}.json. For example, Bryan Bresee’s path would be recruit-timeline-histories/2020/46038819.json in the following format:
recruit-timeline-histories/2020/46038819.json
{
"247_id":"46038819",
"event_date":"2020-01-08",
"event_type":"Enrollment",
"event_description":"Bryan Bresee enrolls at Clemson Tigers",
"school":"Clemson"
}
Given the large amount of data to process during stage two, this repository also includes a bootstrapping shell script for EC2 instances to install the Python tooling, configure the virtual environment, and pull the data from stage one via S3. Pass the following to the user data field when provisioning a new EC2 instance:
Note that since S3 bucket names are globally unique, this will need to be changed for any other bucket. An IAM role with access to the target bucket must be attached to the EC2 instances as well.
Stage Three: Cleanup, Normalization, and Optimization
After the first two stages, there are three output directories containing data:
recruit-lists now contains one file per year containing all recruits from that year.
recruit-ranking-histories now contains subdirectories for each year storing an individual JSON file per recruit capturing ranking changes.
recruit-timeline-histories now contains subdirectories for each year storing an individual JSON file per recruit capturing events like official visits.
There are also several utility scripts to apply additional transformations. The first of these is merge_utility.py which merges all recruit files in each of the top-level year directories into a single file. This can be easier to manage than handling the thousands of files generated by stages one and two depending on the use case. Specifically, it is more performant for Athena which prefers larger files (~100MBs is the sweet spot according to the AWS documentation) as opposed to a higher volume of files. To run, use the command python merge_utility.py <PATH_TO_DIRECTORY_WITH_FILES_TO_MERGE> <PATH_TO_OUTPUT_FILE>.
Both the recruiting history and event timeline scraping produced numerous duplicates. These data structure don’t have a unique identifier (i.e. 247_id). duplicate_composite_utility.py creates a composite key by concatenating all fields together to detect duplicates and deletes accordingly:
duplicate_composite_utility.py
defbuild_composite_key(data):
composite_key =''
for key in data.keys():
composite_key +=str(data[key])
return composite_key
To run, use the command python duplicate_composite_utility.py <PATH_TO_FILE_WITH_COMPOSITE_KEY>.
Numerous duplicate recruits exist after producing the recruit lists in stage one, so duplicate_utility.py can be run to clean a stage one output file in place: python duplicate_utility.py <PATH_TO_RECRUIT_LIST_FILE>.
For this project, Athena is cheaper and simpler to stand up than a dedicated, relational database that would require additional ETL jobs or scripts to migrate from the JSON source files to tables. Athena uses serverless compute to query these raw files directly from S3 with ANSI SQL. After Athena and the Glue Data Catalog have been configured, SQL queries can be run against the datasets in-place. For example, this query computes when commits from the 2020 class were extended offers by the University of Texas at Austin: